Huy Ngo
Oct 31, 2019
In previous article, we have created a simple smart contract and run some unit tests using Truffle suite. In this post, I will walk you through steps to simulate a local Ethereum network, deploy our smart contract, and call methods of the deployed contract.
We will use ganache, a simulation tool in Truffle suite, to simulate a local block chain network in our development PC. Firstly, please go ahead to download and install this tool to your PC.
After installed ganache, you can run it and choose QUICK START. This option will let ganache start a simulated network with its default settings. It’s good enough for us at this moment.
Wait until ganache finish the setup then choose Setting > Server, You will see Port Number and Network ID listing out there. Open the truffle-config.js in our project, uncomment the development section and update the values inside follow info listed on ganache:
  development: {
     host: "127.0.0.1",     // Localhost (default: none)
     port: 7545,            // Standard Ethereum port (default: none)
     network_id: 5777,      // Any network (default: none)
    },
That’s it. Now we can go ahead and deploy our contract to local network:
truffle migrate --network development
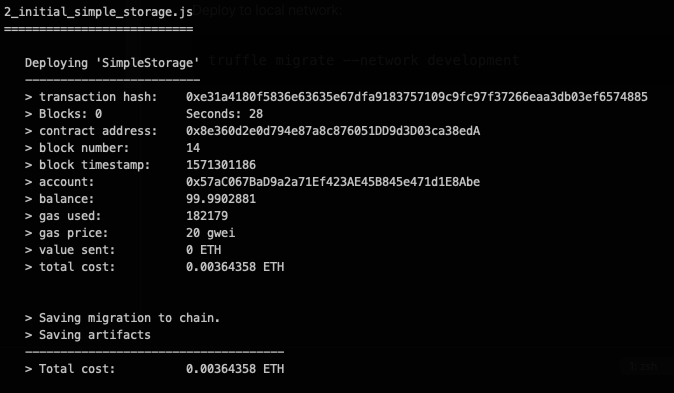
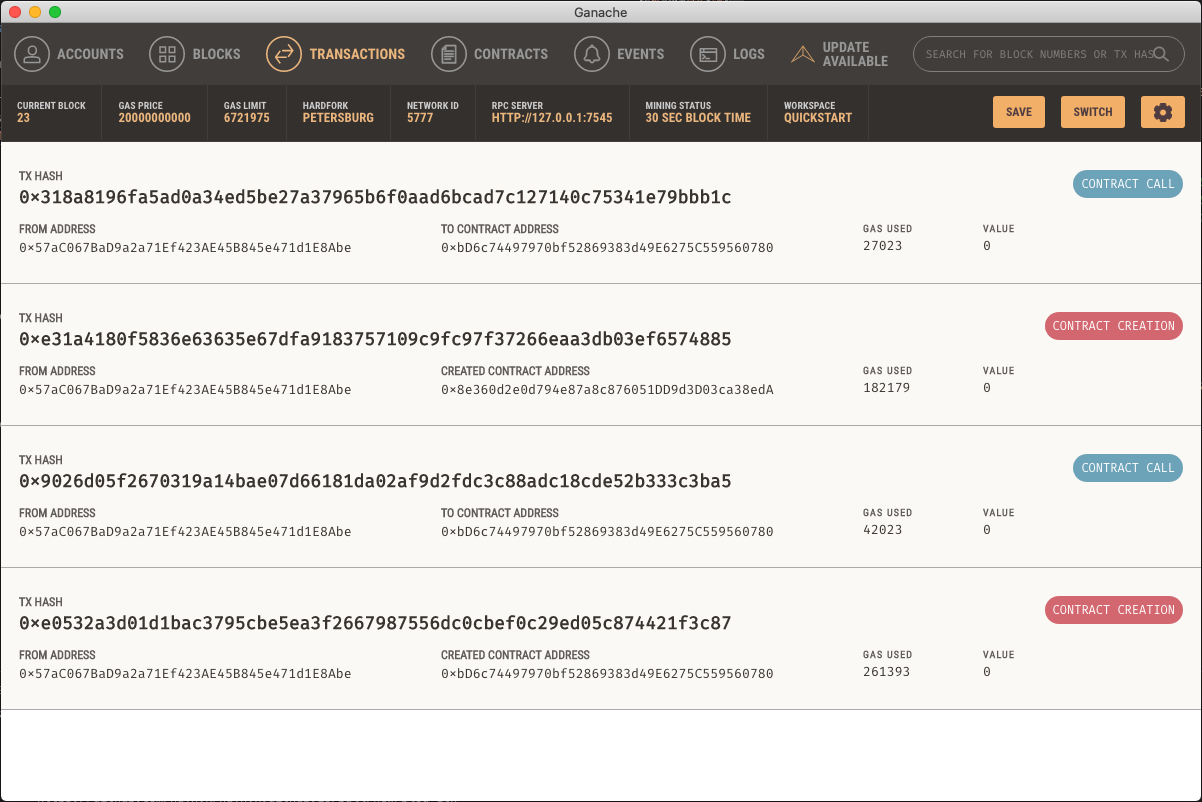
You can check the deployment transaction on ganache in transaction tab.
After deployed the smart contract to Ganache, you can interact with it using Truffle Console. To start, issue the command below:
truffle consoleBy default, Ganache will create 10 test accounts, each of them has 100ETH. The command truffle migrate above will deploy the contract to Ganache test net on behalf of one of these 10 accounts (default is the first one). You can see transaction details for this creation (Sender, Created Contract Address, Gas Used, Gas Price, Gas Limit, Mined In Block, etc.) on Ganache as well.

Let’s play a bit with the console. Firstly, we need to get the instance SimpleStorage that we have just deployed. The instance is required to call contract’s method later on:
let instance = await SimpleStorage.deployed()Issue below command and see details info of the instance object:
instanceThe console will list out all properties of the smart contract. There are 2 most important info: abi and address. abi is a prototype of the contract which defines its methods and arguments. Others can follow this prototype to call methods of the contract. address is public address of this contract on the network. Knowing addressand abi of a contract is a must for other users to interact with the contract.
  abi:
   [ { constant: true,
       inputs: [],
       name: 'storedData',
       outputs: [Array],
       payable: false,
       stateMutability: 'view',
       type: 'function',
       signature: '0x2a1afcd9' },
     { constant: true,
       inputs: [],
       name: 'owner',
       outputs: [Array],
       payable: false,
       stateMutability: 'view',
       type: 'function',
       signature: '0x8da5cb5b' },
     { inputs: [],
       payable: false,
       stateMutability: 'nonpayable',
       type: 'constructor',
       constant: undefined },
     { constant: false,
       inputs: [Array],
       name: 'set',
       outputs: [],
       payable: false,
       stateMutability: 'nonpayable',
       type: 'function',
       signature: '0x60fe47b1' },
     { constant: true,
       inputs: [],
       name: 'get',
       outputs: [Array],
       payable: false,
       stateMutability: 'view',
       type: 'function',
       signature: '0x6d4ce63c' },
     { constant: false,
       inputs: [],
       name: 'kill',
       outputs: [],
       payable: false,
       stateMutability: 'nonpayable',
       type: 'function',
       signature: '0x41c0e1b5' } ],
  address: '0x8e360d2e0d794e87a8c876051DD9d3D03ca38edA',
Another way to instantiate the contract is calling web3.eth.Contract with abi and address:
let instance = new web3.eth.Contract(abi, address)Now we can call methods of SimpleStorage via this instance. You can try below command in your truffle console. Notice that the value is stored as hexadecimal, we will need to convert it to decimal to receive the exactly value we have set.
instance.get.call()
instance.set(9999)
instance.get.call() // Output: <BN: 270f>
instance.get.call().then(value => console.log(parseInt(value, 10))) // Output: 9999In this article, we have simulate an Ethereum network in our local PC, deploy a smart contract on it, and try to call some methods using web3 library. In next article, I will show you how to deploy the contract to RinkeBy, a popular test net of Ethereum.
